

A burst pipe in a University District Craftsman home is not the same emergency as a burst pipe in a Bellevue townhome. The materials are different. The stakes are different. And the restoration approach has to be different, too.
Old-growth Douglas Fir built these homes over a century ago. The wood is dense, resinous, and irreplaceable. Handle it wrong during drying and you will cause warping, checking, and finish failure that no amount of sanding can fix. Handle it right and you can return a flooded Craftsman to its original character without replacing a single piece of historic millwork.
This guide covers what that actually looks like, from the moment water hits your subfloor to the final moisture reading that says you are done.

Why University District Craftsman Homes Respond Differently to Water Damage
The U-District sits within one of Seattle’s densest concentrations of pre-1940s housing stock. Many of these homes were built during a period when old-growth timber was the standard, not the exception. The Douglas Fir used in their floors, wainscoting, window casings, and built-in cabinetry came from trees that were hundreds of years old at the time of milling.
That age matters in a flood event. Old-growth Douglas Fir has a much tighter grain structure than modern kiln-dried lumber. It is also more hygroscopic, meaning it absorbs and releases moisture slowly and unevenly. Push too much heat at it too fast and the surface dries while the core stays saturated. The result is checking, which is surface cracking along the grain, and cupping, where floorboard edges lift above their centers.
Modern restoration equipment is calibrated for kiln-dried softwood or engineered products. If a crew rolls in with high-velocity air movers on full blast and aims them at your 1920s fir floors without any psychrometric management, they will damage the wood faster than the water did.
Seattle’s climate compounds this. The region averages over 37 inches of rainfall annually, and relative humidity in neighborhoods like the U-District, Wallingford, and Green Lake regularly sits between 70 and 85 percent during the wet season. That ambient humidity slows the evaporation gradient and extends drying timelines compared to drier climates. A crew that does not account for this will either rush the process or misread their equipment readings.
The First 24 Hours After a Pipe Burst in a Historic Home
The actions taken in the first day after a pipe burst determine whether the woodwork can be saved at all. Speed matters, but controlled speed matters more.
- Shut Off the Water Source
Locate the main shutoff valve and close it immediately. In older U-District homes, this is often a gate valve under the house or in a basement utility area. If the valve is stuck or corroded, call a plumber before attempting to force it.
- Photograph Everything Before Touching It
Your insurance adjuster and any historic preservation assessor will need a clear record of the pre-remediation condition. Photograph each affected room from multiple angles, including close-ups of trim, built-ins, flooring, and wall surfaces.
- Remove Standing Water Immediately
Use a wet vacuum or extraction unit to pull standing water off the surface. Do not use standard box fans at this stage. Uncontrolled airflow on saturated old-growth wood causes differential drying and rapid surface checking.
- Open Interior Doors, Not Exterior Windows
During Seattle’s wet months, outside air has a higher moisture content than a controlled interior drying environment. Opening windows floods the drying zone with humid Pacific air. Circulate interior air only until dehumidification equipment is running.
- Contact a Restoration Specialist Before Contacting General Contractors
A general contractor will often recommend tear-out as the default path. A water damage specialist with historic preservation experience will assess whether controlled drying can save the original materials first.
Moisture Content Targets for Historic Douglas Fir in Seattle’s Climate
Every piece of old-growth wood in your home has a natural equilibrium moisture content (EMC) based on the surrounding environment. In Seattle, that EMC for interior Douglas Fir typically sits between 9 and 13 percent depending on the season and how well the home is conditioned.
After water damage, that number spikes dramatically. Saturated fir flooring can read at 25 to 40 percent on a pin-type moisture meter. Your target during restoration is to return the wood to within 2 percent of its pre-loss EMC, which for most U-District homes means getting back down to that 9 to 13 percent range before any refinishing or structural assessment happens.
| Wood Material | Post-Flood Moisture Range | Target Restoration EMC | Estimated Drying Timeline (Non-Invasive) |
|---|---|---|---|
| Old-growth Douglas Fir flooring | 22 to 40% | 9 to 11% | 14 to 28 days |
| Lath and plaster walls (wood lath) | 20 to 35% | 10 to 13% | 18 to 35 days |
| Historic fir millwork and trim | 18 to 30% | 9 to 12% | 12 to 21 days |
| Built-in cabinetry and wainscoting | 15 to 28% | 9 to 12% | 14 to 24 days |
These timelines assume non-invasive drying with commercial low-grain refrigerant (LGR) dehumidifiers and controlled air movement. Rushing the process to meet a shorter timeline is one of the most common causes of irreversible damage in historic homes.
Non-Destructive Drying Equipment for Lath and Plaster Walls
Standard remediation practice for water-damaged drywall is to cut it out and replace it. That approach does not apply to the lath and plaster walls found in most University District Craftsman homes. These walls are a functional part of the building’s historic character, and in homes that fall within the scope of Seattle Landmarks Preservation Board oversight, unauthorized removal can create compliance problems.
The correct approach uses cavity drying systems that inject conditioned air directly into the wall assembly without opening the surface. Injectidry systems, for example, use small access holes drilled into inconspicuous locations to circulate dry air behind the plaster face. This preserves the plaster while removing moisture from the wood lath beneath it.
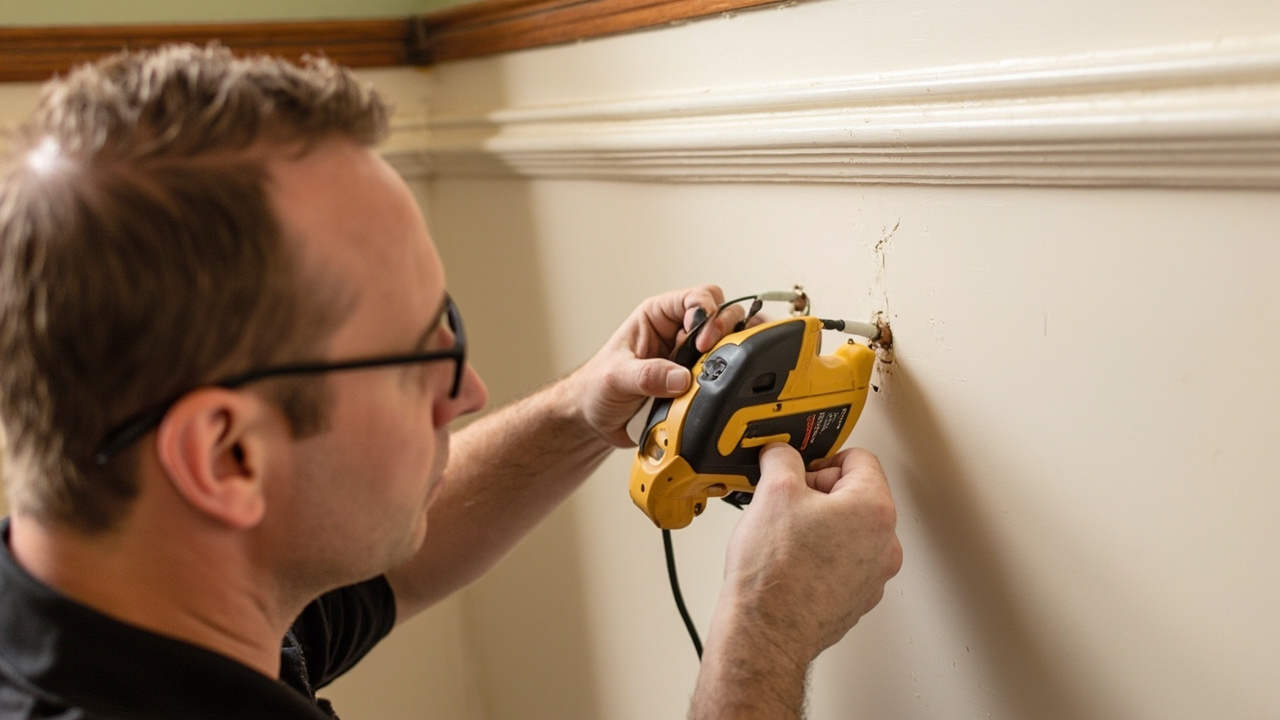
Moisture readings are taken using non-destructive meters, including capacitance-based instruments that read through the plaster surface and hammer-probe meters inserted into the small access holes. This data is logged daily to track the drying curve and confirm when the wood lath has reached an acceptable EMC.
For homes near Capitol Hill or in Queen Anne where the pipe burst response intersects with preservation concerns, this method is the minimum acceptable standard. Aggressive tear-out of plaster walls in a designated landmark structure can trigger a stop-work order from the city.
Seattle Landmarks Preservation Board Requirements During Emergency Restoration
Seattle’s Landmarks Preservation Board (LPB) governs changes to designated landmark structures and contributing buildings within historic districts. If your U-District Craftsman is a designated landmark or sits within a neighborhood conservation area, certain work may require LPB review before proceeding.
The key distinction is between stabilization and alteration. Emergency stabilization work, including water extraction, controlled drying, and temporary protective measures, generally falls outside the permit requirement. However, any work that changes the character-defining features of the structure, such as removing original flooring, replacing historic windows, or altering the exterior, requires a Certificate of Approval from the LPB.
You can review the LPB’s guidelines and check whether your property is a designated landmark through the Seattle Landmarks Preservation Board’s official resources. This step matters before any contractor begins opening walls or removing materials, even in an emergency.
Practically, this means your restoration contractor should document all work with photographs, label and store any materials removed for potential reinstallation, and avoid any alteration to character-defining features unless absolutely necessary for structural safety.
Lead Paint and Asbestos Considerations in Pre-1940s Craftsman Homes
Homes built before 1940 in the U-District, Ballard, and Fremont almost certainly contain lead-based paint on interior woodwork. Many also contain asbestos in floor tiles, pipe insulation, or textured ceiling coatings. A pipe burst that saturates these materials creates a hazmat component that standard restoration crews are not equipped to handle.
During water mitigation in a pre-1940s home, all equipment must be HEPA-filtered. This includes vacuums, air scrubbers, and any negative air machines used during the drying phase. HEPA filtration captures lead dust particles released when wet painted surfaces are disturbed, preventing cross-contamination into unaffected areas of the home.
If asbestos-containing materials are disturbed by the water event, a licensed asbestos inspector must assess the site before restoration work proceeds. Attempting to dry or remove asbestos floor tiles without proper testing and abatement is a regulatory violation under Washington State Department of Labor and Industries rules.
Any contractor working in a pre-1940s Seattle home should be certified under the EPA’s Renovation, Repair, and Painting (RRP) rule. Ask for proof of this certification before work begins. For more on what happens when water damage crosses into hazardous materials territory in older Seattle homes, the issues are similar to what Ballard homeowners face during basement flooding events.
Historic Woodwork Comparison by Restoration Approach
One of the most common questions homeowners ask is whether to restore or replace damaged historic millwork. The answer depends on the material, the extent of damage, and the long-term preservation goals for the property.
| Feature | Controlled Drying and Restoration | Tear-Out and Replacement |
|---|---|---|
| Preserves original old-growth Douglas Fir | Yes | No |
| Maintains historic character for LPB compliance | Yes | Potentially not |
| Risk of checking and cupping if rushed | Moderate (manageable with proper equipment) | N/A |
| Drying timeline | 14 to 35 days depending on assembly | 3 to 7 days before rebuild begins |
| Finish compatibility after drying | Original shellac and varnish can be reapplied | New finishes only |
| Material availability for replacement | N/A | Old-growth fir is scarce and costly to source |
| Insurance documentation requirements | Detailed moisture logs required | Photo documentation of removed materials |
In most cases, restoration is the right choice for original Craftsman woodwork. The scarcity of old-growth Douglas Fir means that even when replacement is physically possible, sourcing matching material is expensive and often impossible for things like built-in bookshelves or original fir window casings.
Restoring Cupped Hardwood Floors in a Craftsman Home
Cupping is one of the most visible signs of water damage in historic fir floors. It happens when the bottom face of a floorboard absorbs moisture faster than the top, causing the edges to rise. Mild cupping in old-growth fir can often be corrected through controlled drying alone, without sanding or refinishing.
The process requires patience. Daily moisture readings track the drying curve across multiple points on the floor. As the wood returns to its target EMC, the cup often resolves on its own because old-growth fir has the structural integrity to spring back when dried correctly.
If cupping persists after the wood reaches target moisture levels, the floor may require light sanding and refinishing. Historic fir floors were typically finished with shellac, oil-based varnish, or a penetrating oil. These finishes are compatible with old wood and are still available. Water-based polyurethane, which is common on modern floors, can raise the grain on old fir and may not adhere correctly to wood that still carries residual resin.
For severe cupping where boards have buckled or the subfloor assembly has been compromised, you will need a structural assessment before any floor work proceeds. The IICRC S500 Standard for Professional Water Damage Restoration provides the framework for these assessments, and any contractor you hire should be working within it. Homeowners dealing with similar floor-level moisture questions in other neighborhoods can find related guidance in our guide on mold risks associated with damp walls and flooring.

Mold Risk in Historic Craftsman Homes After a Pipe Burst
Seattle’s ambient humidity creates a narrow window between water intrusion and mold growth. In a saturated wall or floor cavity, mold can establish within 48 to 72 hours under the right temperature and humidity conditions. In a Craftsman home with limited wall ventilation and dense wood assemblies, that window can be even shorter.
Old-growth Douglas Fir has some natural resistance to mold due to its resin content, but the organic material in lath and plaster walls, including the animal hair binder used in original plaster mixes, is highly susceptible. Mold in a plaster wall is often not visible on the surface until it is well established behind the finish coat.
Proper drying protocol includes daily air quality monitoring and visual inspection of accessible cavities. If mold is detected before drying is complete, remediation must happen in coordination with the drying process, not after, to prevent spore dispersion through the air movement equipment.
This is a significant reason why historic home water restoration should be handled by a firm that integrates both moisture remediation and mold management. Treating them as separate scopes with separate contractors creates gaps where mold can establish between project phases.
What to Expect When You Call Evergreen Water Damage Restoration
When you call after a pipe burst in your University District, Fremont, or Wallingford Craftsman home, the first conversation is about triage, not paperwork. The goal is to understand what materials are at risk, how long the water has been present, and whether the home has any known landmark or historic designation status.
From there, the team dispatches with the right equipment for a historic wood environment, including LGR dehumidifiers, Injectidry cavity drying systems, HEPA air scrubbers, and non-destructive moisture meters. Every reading gets logged. Every decision about material removal gets documented and discussed with you before action is taken.
The goal is the same as it has been for every Craftsman home we have worked in across this city. Preserve first. Replace only when there is no alternative. And get the moisture readings right before anyone picks up a sander or a brush.
If you are dealing with a pipe burst right now or are assessing the aftermath of one, call Evergreen Water Damage Restoration Seattle. Available 24 hours a day, seven days a week. Serving the U-District, Capitol Hill, Queen Anne, Wallingford, and throughout the greater Seattle metro area.
Frequently Asked Questions
Can old-growth Douglas Fir floors be saved after a pipe burst, or do they always need replacement?
In most cases, yes, they can be saved with controlled drying. Old-growth fir is dense and resilient when dried at the correct rate. The key is avoiding high-temperature, high-velocity drying in the first 48 to 72 hours. After the wood reaches its target equilibrium moisture content, most cupping and minor distortion resolves without sanding. Replacement is typically only necessary when boards have buckled, cracked through, or when the subfloor assembly beneath them has failed structurally.
Does my University District Craftsman need a permit for emergency water damage restoration?
Emergency stabilization work generally does not require a permit from the Seattle Landmarks Preservation Board. This includes water extraction, drying, and temporary protective measures. However, if your home is a designated landmark or contributing structure within a historic district, any permanent alteration to character-defining features, including original floors, walls, trim, or built-ins, requires a Certificate of Approval before work proceeds. Always verify your property’s designation status with the Seattle Department of Construction and Inspections before authorizing material removal.
How long does non-invasive drying take in a Craftsman home compared to standard drywall construction?
Non-invasive drying of lath and plaster walls and old-growth fir assemblies typically takes two to four times longer than drying modern drywall. Expect a minimum of 14 days for moderately affected areas and up to 35 days for heavily saturated wall and floor assemblies. Seattle’s high ambient humidity extends these timelines compared to drier climates. Drying cannot be safely rushed without risking permanent damage to the historic wood.