

The Top Causes of Water Seeping into Detached Workshops in Lawton Park
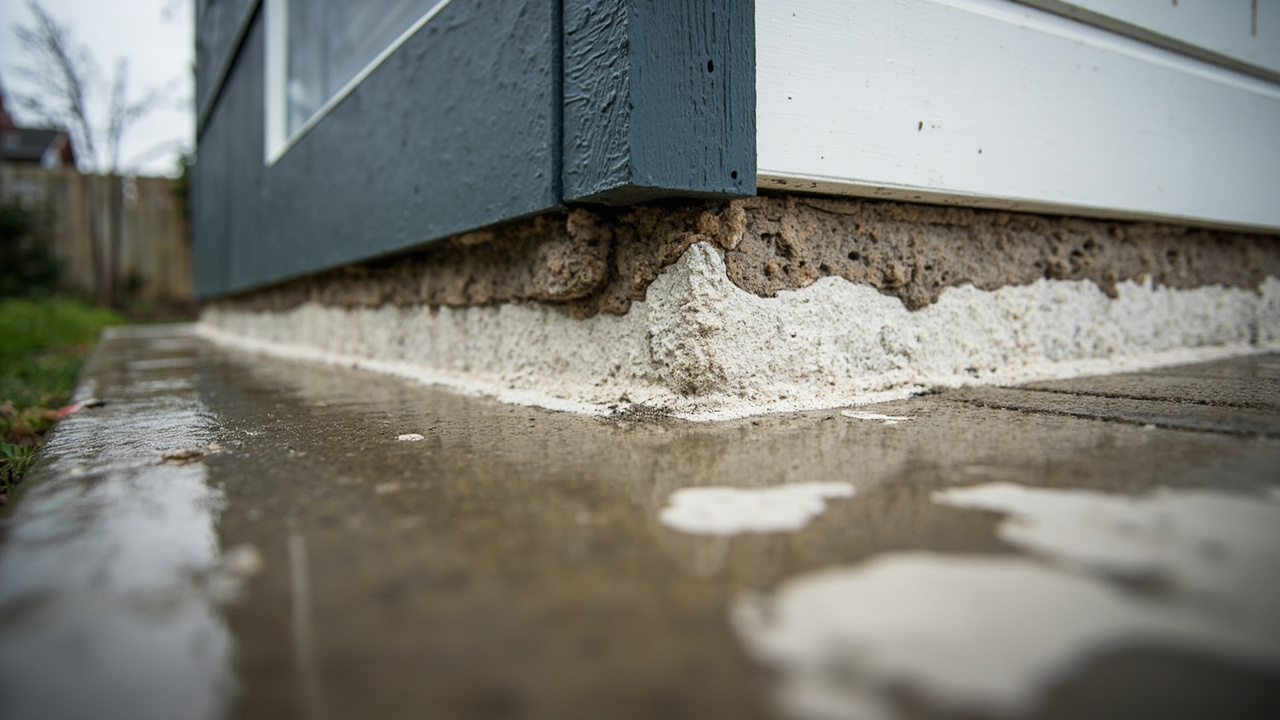
Homeowners along Lawton Park Drive and near the bluff edge terrain of Magnolia deal with three workshop seepage problems more than any other. First, poor landscape grading directs rainwater straight toward your slab edge, and you will see wet concrete or standing puddles along the foundation base within hours of rainfall. Second, clay soil on Magnolia’s slopes builds hydrostatic pressure against any concrete wall or slab, and the telltale sign is efflorescence, the white chalky mineral crust that appears on your walls and floor after storms. Third, older slabs with no vapor barrier wick ground moisture upward continuously, leaving a slab that feels damp even on dry days. If you recognize any of these symptoms on your property, the sections below give you a targeted path to fix each one.
Lawton Park sits in the Magnolia corridor, where sloped terrain and clay-heavy subsoil create significant hydrostatic pressure against any below-grade or slab-on-grade structure. When the soil becomes saturated, it builds pressure against your workshop foundation the same way water presses against a dam. That pressure finds every crack, pore, and gap in your concrete. Understanding the specific cause is the first step to fixing it permanently.
The Hydrostatic Pressure Problem on Seattle’s Slopes
Seattle’s hilly topography makes hydrostatic pressure one of the most common causes of detached garage water seepage. Neighborhoods like Queen Anne, Capitol Hill, and Magnolia all share this challenge. When rain saturates the clay-heavy soil above or beside your studio, that soil holds water like a sponge and pushes it laterally toward any vertical concrete surface.
Concrete porosity makes this worse. Standard concrete is not waterproof. Water molecules travel through the microscopic pores in cured concrete, especially in older slabs. Many detached garages and backyard studios that predate modern building codes lack any vapor barrier between the gravel base and the slab itself. The slab sweats from below.
Atmospheric Rivers and Magnolia’s Clay Slopes
The Pacific Northwest experiences atmospheric river events, which are concentrated bands of moisture that deliver rainfall totals of 2 to 4 inches within 24 to 48 hours. Seattle averages over 37 inches of annual precipitation, but the distribution matters more than the total. These concentrated rain events overwhelm both landscape drainage and urban stormwater systems faster than gradual drizzle does.
On Magnolia’s clay slopes, seepage events in detached structures most commonly begin after rainfall exceeds 1.5 inches in a single 24-hour window. At that threshold, the clay subsoil reaches near-full saturation and loses its capacity to absorb additional water, which forces it laterally into any adjacent foundation. Stormwater from Lawton Park properties drains into the Kiwanis Ravine and Salmon Bay watershed, a system that moves high volumes of runoff quickly during atmospheric river events and raises the effective water table on hillside lots faster than properties outside this drainage basin experience. The Washington State Department of Ecology’s stormwater and flooding guidance documents how clay-dominant soils in Puget Sound lowlands respond to short-duration high-intensity rain events, a pattern directly relevant to Lawton Park properties on hillside lots. After a storm delivers more than 1.5 inches, inspect your studio’s slab perimeter and lower wall framing before the next rain cycle hits, because that narrow window is when new seepage pathways open.
After an atmospheric river hits, the soil around your studio reaches full saturation quickly. Groundwater tables rise, and water that had nowhere to go begins pooling at your slab perimeter. That pooling creates the hydrostatic pressure that drives seepage. If you notice wet floors or efflorescence shortly after heavy rain, atmospheric river events are likely the trigger.
Common Causes of Water Seepage in Detached Structures
Most seepage problems trace back to one or more of these specific failure points. Diagnosing the right cause saves you money and keeps you from applying the wrong fix.
- Poor landscape grading. The ground around your studio should slope away from the foundation at a minimum 6-inch drop over the first 10 feet. Flat or inward-sloping grades funnel rainwater directly toward the slab edge.
- Clogged or absent perimeter drains. Many Lawton Park detached structures had no perimeter drain tile at construction. Those that have it often suffer from root intrusion or sediment buildup that renders the system useless.
- Concrete slab cracks. Freeze-thaw cycles, soil settlement, and tree root pressure cause hairline to significant cracks in the slab. Even a 1mm crack allows substantial water infiltration under hydrostatic pressure.
- No vapor barrier under the slab. Older detached studios often sit on compacted gravel with no poly sheeting below the concrete. Ground moisture wicks upward through the slab continuously.
- Failing or absent sill plate flashing. Where the framed wall meets the slab, water can enter the wall system and cause rot in sill plates before you see moisture on the floor.
- High water table in low-lying areas. Properties near Puget Sound or in low valley areas like parts of Ballard and Green Lake face seasonal water table rise that pushes moisture up through slab pores from below.

The Real Risks of Letting Seepage Go Untreated
Structural Rot and Sill Plate Damage
Moisture at the base of your workshop walls attacks the sill plate, the bottom horizontal lumber member that carries your wall framing. Wood rot at the sill plate is expensive to repair because it requires lifting the wall framing, removing the rotted material, and reanchoring a new pressure-treated sill. Many homeowners in Fremont and Wallingford have discovered this damage only after years of assumed minor dampness.
Toxic Mold Growth in Unconditioned Spaces
Most detached workshops run unconditioned year-round. Without heating and ventilation, indoor relative humidity stays high year-round in Seattle’s climate. Wet concrete plus stagnant humid air creates the exact conditions that Stachybotrys chartarum (black mold) needs to colonize. Black mold produces mycotoxins that cause respiratory symptoms, and remediation in a workshop space costs significantly more than prevention.
Most Lawton Park workshops were built between the 1940s and 1970s when vapor barriers were not required, meaning the slab and lower framing in these structures never received the moisture protection that current code demands. If your studio holds woodworking equipment, electronics, or stored documents, mold contamination can destroy those assets faster than the water itself. For a deeper look at what hidden mold does to your property, read how hidden mold spreads behind walls in Seattle homes.
Damage to Electrical Systems and Equipment
Chronic slab moisture corrodes electrical panel boxes, conduit connections, and outlets at floor level. Workshop tools left on concrete floors absorb moisture through their bases, causing premature rust and bearing failure. If your studio houses a subpanel that draws power from the main house, water infiltration near that panel creates a serious shock and fire hazard.
DIY Fixes That Work vs. Problems That Need a Professional
Some seepage situations suit a capable DIYer. Others require professional equipment, permits, or structural expertise. Knowing the boundary saves you time and protects you from making a problem worse.
| Problem Type | DIY Viable | Professional Required | Reason |
|---|---|---|---|
| Surface efflorescence | Yes | No | Wire brush removal and masonry sealer application is straightforward |
| Minor grading correction | Yes | No | Adding topsoil and regrading within property limits needs no permit |
| Interior vapor barrier on slab | Yes | No | Roll-out poly sheeting under flooring is a standard DIY task |
| Hairline crack epoxy injection | Partial | Preferred | Polyurethane or epoxy injection kits exist for DIY but professional pressure injection seals deeper |
| French drain or perimeter drain installation | No | Yes | SDCI may require a permit and grading plan for exterior drainage work |
| Sump pump installation | No | Yes | Electrical connection and discharge routing require permits |
| Exterior waterproofing membrane | No | Yes | Requires excavation around the foundation perimeter |
| Active mold remediation after seepage | No | Yes | IICRC S520 standards require containment, air scrubbing, and proper disposal |
Landscape Grading and Swales
Start outside. Walk around your workshop after a rain and watch where water flows. Any area where water pools against the foundation or moves toward the structure needs regrading. Add compacted soil to build a positive slope away from all four sides. A simple swale, a shallow channel cut into the lawn, can redirect sheet flow from a slope above your studio before it reaches the perimeter.
French Drain Installation for Detached Structures
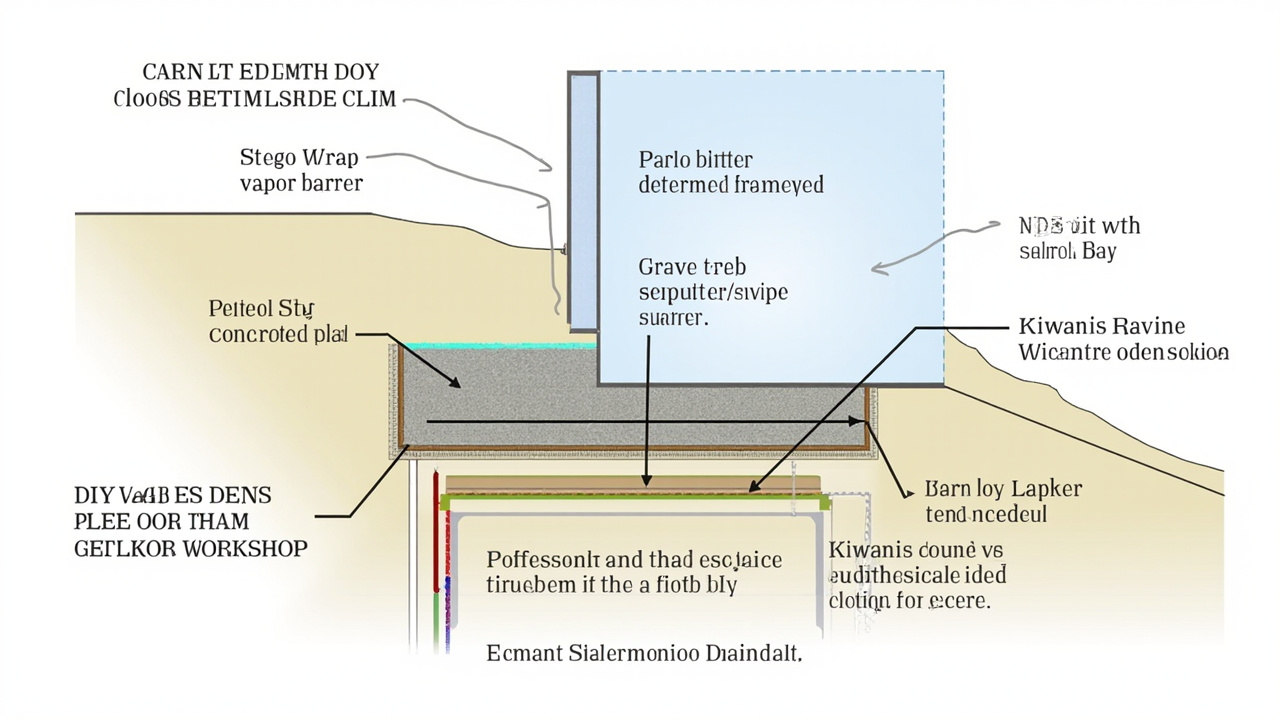
A French drain uses a perforated pipe set in a gravel trench, installed at the perimeter of your studio to intercept groundwater before it reaches the foundation. Contractors serving Magnolia and Lawton Park typically specify NDS perforated pipe in 4-inch diameter for this application, as NDS fittings and sock filters allow clean integration with existing downspout networks. For slab-on-grade detached structures in Seattle, a trench drain at the uphill side of the building is often the most cost-effective long-term solution to hydrostatic pressure.
The pipe must drain to a discharge point such as a dry well, a municipal storm drain connection (which requires a permit), or a downhill daylight outlet on your property. The Seattle Department of Construction and Inspections (SDCI) requires permits for any new drainage connection to the municipal stormwater system. The King County Stormwater Services program also publishes drainage standards that apply when your discharge could affect neighboring properties on Magnolia’s downslope lots.
Sump Pump Installation and Redundancy
If your studio sits in a low spot or the water table rises seasonally, a sump pit and pump system provides active protection that passive drainage cannot. Restoration contractors in the Magnolia area frequently specify the Zoeller M53 Mighty-Mate as the primary pump and pair it with the Zoeller 508 AquaNot battery-backup unit, a combination that maintains discharge capacity during the power outages that often accompany the same storms triggering flooding. Sump pump installation in a concrete slab requires core drilling and belongs to a licensed contractor.
Concrete Crack Injection
Foundation wall cracks and slab cracks require sealing from within the concrete matrix, not just surface patching. Polyurethane foam injection expands to fill voids and remains flexible after curing, which matters in Seattle’s soil-shifting conditions. Epoxy injection creates a rigid bond suited to structural cracks that need strength restoration. A certified technician determines which material fits each crack type and injects it under controlled pressure.
Vapor Barriers and Epoxy Coatings
Interior vapor barriers address the upward wicking of moisture through the slab itself. A contractor or DIYer installs 10-mil or 20-mil Stego Wrap reinforced polyethylene sheeting across the full slab surface, laps seams by 12 inches, tapes all joints with Stego Tape, and runs the sheeting up the walls 6 inches before securing it in place. That assembly creates a capillary break between the ground and your workshop floor that a standard 6-mil poly sheet cannot match in longevity or puncture resistance. Over that vapor barrier, an epoxy floor coating adds a second layer of moisture resistance while giving you a cleanable surface.
Epoxy coatings alone do not solve hydrostatic pressure. They resist moisture wicking but will bubble and delaminate if significant water pressure exists beneath the slab. Fix the drainage first, then apply the coating.
Seattle Building Codes and SDCI Permit Requirements
The Seattle Residential Code (SRC) and Washington State Energy Code both specify moisture control requirements for accessory structures. The Washington State Energy Code requires vapor retarders in contact with the ground in unconditioned crawl spaces and below slabs, a standard that many older detached studios in Lawton Park and Ballard predate.
When you install a French drain that connects to the municipal system, or when you add a sump pump discharge line that exits to the street, SDCI requires a drainage permit. Unpermitted drainage work creates liability when you sell your property. A licensed contractor familiar with SDCI processes files the permit, completes the work to code, and submits it for final inspection approval.
Exterior waterproofing that involves excavation deeper than 18 inches near the property line may also trigger grading permit requirements under King County drainage regulations. Get this confirmed before you dig.
Comparing Slab-on-Grade Solutions vs. Trench Drain Systems
| Solution | Best For | Approximate Timeline | Key Limitation |
|---|---|---|---|
| Interior vapor barrier only | Slab wicking with no active groundwater | 1 day installation | Does not address hydrostatic pressure |
| Epoxy floor coating | Light moisture, aesthetic improvement | 2 to 3 days with cure time | Bubbles under hydrostatic pressure |
| Perimeter French drain (exterior) | Hydrostatic pressure on sloped sites | 2 to 4 days excavation and install | Requires permit for municipal connection |
| Interior trench drain at slab perimeter | Active water entry at slab-wall joint | 1 to 2 days concrete cutting and install | Requires sump pit and pump for discharge |
| Sump pump system | High water table, low-lying lots | 1 day for pit and pump | Needs power and regular maintenance |
| Exterior waterproofing membrane | Foundation wall seepage | 3 to 5 days excavation and coating | Highest cost, most disruptive |
What Professional Structural Drying Looks Like After Seepage
Once water enters your workshop, structural drying is not optional. Concrete absorbs water into its matrix and holds it. Framing lumber at the slab level can reach hazardous moisture content within 48 to 72 hours. Professional structural drying uses IICRC S500-certified protocols, which set the standard for moisture measurement, equipment placement, and drying verification in the restoration industry.
An IICRC-certified technician from Evergreen Water Damage Restoration Seattle places industrial air movers and dehumidifiers in a calculated pattern to create directed airflow. Moisture meters take baseline readings at the slab, framing, and wall sheathing. The team revisits daily to confirm drying progress and adjust equipment. In Seattle’s high-humidity climate, where relative humidity regularly exceeds 80 percent outdoors, professional dehumidifiers do work that open windows cannot.
For reference on how delayed drying creates compounding damage, read about why waiting to dry after water intrusion makes everything worse.
Insurance Coverage for Detached Workshops and Studios
Your homeowner’s insurance policy covers detached structures under Coverage B, which is typically 10 percent of your dwelling Coverage A limit. A $600,000 Coverage A policy gives you $60,000 in Coverage B for your studio or workshop. That sounds substantial until you factor in that most standard policies exclude damage from groundwater seepage, flooding, and hydrostatic pressure.
Water seepage that results from a sudden and accidental event (like a burst supply line) differs from gradual groundwater intrusion. Insurers often deny claims for the latter. Flood insurance through the National Flood Insurance Program covers rising groundwater but requires a separate policy with a 30-day waiting period before binding. If you plan on using insurance to cover a restoration event, understanding this distinction matters. Learn more about handling the claims process in our guide on water damage insurance claims for Seattle homeowners.
Preventing Mold After You Solve the Seepage
Stopping the water entry does not automatically resolve a mold risk. If seepage ran for weeks or months before you addressed it, Stachybotrys and other mold species may already have colonized the framing, OSB sheathing, or stored materials. Test for mold before assuming the structure is clean after drying.
After remediation and drying, maintain your studio’s relative humidity below 60 percent using a standalone dehumidifier with a continuous drain. Install a hygrometer to monitor conditions. Check the sill plate and lower wall framing annually for soft spots, which indicate ongoing moisture exposure even at low levels. If your studio sits in a basement or semi-buried configuration like some backyard ADUs in West Seattle or Beacon Hill, understand how slow moisture intrusion affects below-grade spaces year-round.
- Diagnose the entry point
After a rain event, inspect the full slab perimeter for wet spots, efflorescence staining, and wall base dampness. Use a moisture meter on the concrete and lower framing to confirm where water concentrates. On Magnolia lots, inspect immediately after any storm delivering more than 1.5 inches in 24 hours, as that threshold regularly triggers new seepage on clay subsoil.
- Correct landscape grading first
Add soil along all foundation sides to create a positive slope away from the structure. Address any swale or drainage channel above the studio that directs flow toward it.
- Install or clear perimeter drains
Inspect existing drain tile at the foundation perimeter. If none exists and hydrostatic pressure is your problem, contact a licensed contractor and SDCI to plan a permitted French drain installation using NDS perforated pipe with a filter sock to prevent sediment clogging.
- Seal active cracks
Use a polyurethane or epoxy injection system on any cracks in the slab or foundation walls. Address hairline cracks before they widen under freeze-thaw cycles.
- Install an interior vapor barrier
Lay Stego Wrap 10-mil or heavier sheeting across the full slab, lap seams by 12 inches, and tape all joints with manufacturer-approved Stego Tape. Run the sheeting up the walls and secure it before laying any floor covering.
- Add a sump pump system if needed
For sites with a high water table or recurring infiltration despite drainage corrections, hire a licensed contractor to core-drill a sump pit, install a Zoeller primary pump, and add a battery-backup unit for storm-night protection.
- Call for professional structural drying
If water already entered the studio, contact an IICRC-certified restoration company immediately. Do not wait. Mold colonization begins within 24 to 48 hours in Seattle’s humidity.
When to Call Evergreen Water Damage Restoration Seattle
You can handle grading corrections and minor sealing on your own. But once water has entered your workshop, the drying window closes fast. Seattle’s persistent cloud cover and 70 to 85 percent average outdoor relative humidity mean natural evaporation provides almost no drying assistance. Structural moisture that sits beyond 48 hours creates mold conditions that require professional remediation rather than simple drying.. Read more about How to Handle a Flooded Storage Unit in SODO Without Losing Your Belongings.
Evergreen Water Damage Restoration Seattle serves Lawton Park, Magnolia, Ballard, Fremont, and the broader Seattle metro area with 24/7 emergency response. Our IICRC-certified technicians carry professional moisture meters, industrial dehumidifiers, and air movers to every job. We diagnose the cause, dry the structure to verified standards, and coordinate with you on the waterproofing repairs needed to prevent recurrence.
If you are unsure whether to start with a contractor or a restoration company, read our guide on what to look for when hiring a water restoration company in the Seattle area.
If your workshop shows any sign of active water intrusion, request a free moisture inspection to get a clear picture of what you face before mold turns a drying problem into a full remediation project. Download our free workshop seepage diagnostic checklist to walk your slab perimeter, identify the most common entry points, and document what you find before your inspection appointment.